
Installing Julia
Step 1: Install Julia 1.6
Go to https://julialang.org/downloads and download Julia 1.6.2, using the correct version for your operating system (Linux x86, Mac, Windows, etc).
Mac Setup
For Mac users, you can download the .dmg file and install Julia just like any other software you usually install on a Mac. Once installation is complete, you can run Julia from your Launchpad or from your Applications folder. Once you fire up your Julia, you will see a code similar to the one before
*your-mac-name*:~ *username*$ exec '*path-to-julia-installation-directory*'right before this 
You need to copy the path to a notepad or somewhere handy.
Windows Setup
Upon running the installer you downloaded from Julia's website you will be getting the following window
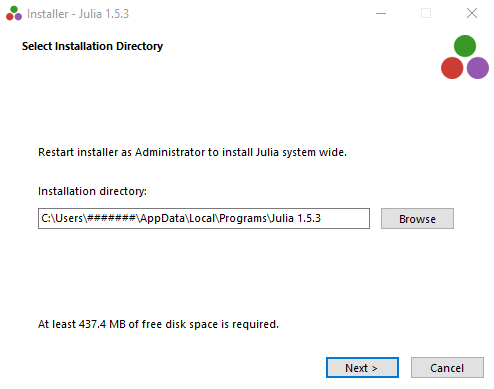
Instead of #### in the image, you will be seeing your computer's name.
You need to copy the installation directory temporarily to a notepad or somewhere handy.
Once ready, proceed to Next. With all the default settings, the installer will also be creating a desktop shortcut.
Step 2: Install VS Code
Download and install VS Code, based on the platform you are using, from the VS Code homepage.
Step 3: Install Julia Extension
Once the VS Code installation is complete, start VS Code from your desktop.
Press
Ctrl + Shift +X(if windows) orCmd + Shift +X(if Mac) to view the Extensions panel towards the left of your VS Code Window.Enter
Juliain the marketplace search box and clickInstall. (Instead of the gear icon in the image, you will be seeing an install button.)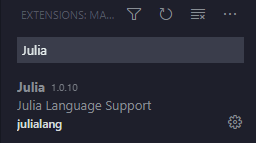
NOTE: It is recommended that you restart VS Code after installation.
Step 4: Configuring the Julia extension
If you installed Julia into a standard location on Mac or Windows, or if the Julia binary is on your PATH, the Julia VS Code extension automatically finds your Julia installation. You do not need to configure the extension. However it doesn't hurt to check if the path is correct as the one you copied to the notepad in step 1.
It is very important to make sure you have the right path, or your Julia wouldn't work inside VS Code.
If the VS Code extension does not find your Julia installation automatically, or to verify the path, use the following steps:
Follow sub-steps 2 & 3 from Step 3 to view the extension panel and julia extension. By clicking on the gear icon you see against
julialang, you will get a drop-down menu. From that drop-down menu, choose,Extension Settingsand you get a window pane like this:
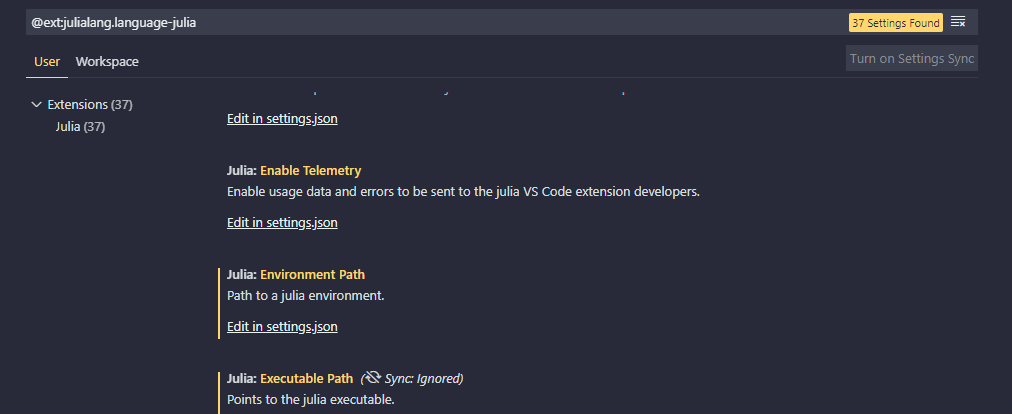
In the textbox, right below
Executable Pathenter the path-to-installation-directory you copied from Step 1.
In some cases, you might have to restart your VS Code to have the changes updated.
(Optional) Step 4: REPL Inside VS Code
To get the REPL(Read-Evaluation-Print-Loop) started inside VS Code, press
Ctrl + Shift + P(for windows) andCmd + Shift +P(for Mac)
Installing Julia Packages
Very often you will have to install third-party packages as part of your programming workflow. Adding new packages is pretty straight forward in Julia.
Once you are in the REPL, type
]. This will take you to Julia's Package Mode and yourjulia>will turn into(@v1.6) pkg>.Once you are inside Julia's package mode, to install a package, simply type
add YourPackageNameand hit enter. After installation is complete, your REPL will return to(@v1.6) pkg>.To exit package mode, simply hit backspace.